Jul 07

An Unexpected Meal

Last year I planted two varieties of broadbeans and they both did reasonably well and we got quite a few meals from them. I liked them so much I retained some of the the beans and planted them a little while ago. They have done ok, but not fabulously well. However, I must have missed quite a few when I collected the beans last year because a mass of beans self-seeded around the place and have gone gang-busters.

Over the last few days I have let the chooks have a bit of a run through the idle vegie beds in preparation for planting and I noticed that there is a profusion of beans ready for the table! As I was feeling just a wee bit peckish I thought “a feed of beans would hit the spot about now”. Then I realised that the rainbow chard had also taken off more than I remembered and the chooks were getting stuck in.

“Right!”, I thought, “that settles it, Beans and Silver Beet it is!”. A few minutes later I was armed to the teeth with fresh beans and greens.

Into the kitchen, into the pot, into the bowl, dotted with butter and finished off with salt, pepper, freshly grated nutmeg and freshly grated parmesan!

10 minutes later… YUM! This is living!! (Hmmm. I think I need a bit of a trim)

What do you think of this post?
  • Awesome (1)
  • Interesting (4)
  • Useful (3)
Jul 04

Blackout Buster – Part 3

The PEB (Portable Energy Box – I really must find a better acronym) is complete. Well, at least electrically.

Today I installed the PV connectors after having kept the unit on charge for a few days to check the performance and make sure the batteries were still in good condition since they had been sitting around for a while. Gel cells tend to have quite a good shelf life as long as they are kept reasonably charged but not all of these have been regularly topped up so it is important to check them over before putting them into service.

I decided to try a different type of terminal for the PV compared to the light terminals. I constructed these terminals from 6mm stainless steel (316) bolts, washers and wingnuts. Partly because I already had the bolts and partly because I thought they would be cheaper and I wanted to try a few different techniques. As it turned out they worked out a little cheaper but I’m not sure it was really worth it. Especially since the terminals I used for the lights are very good quality as well.
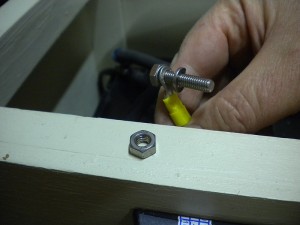
Assembling and Attaching the PV Terminals
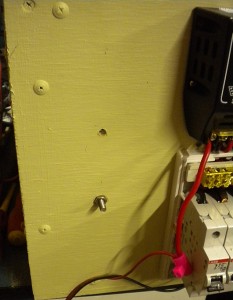
The Negative Terminal in place wating for the Washers and Wingnut


The nice thing about having terminals like these is that the unit becomes truely portable as you can easily connect and disconnect the PV.
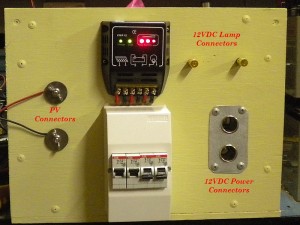
The Completed Unit With All the Connectors

I did a final test with everthing running. The power supply substituted for the PV and the inverter and a lamp were all connected as shown in the pictures. It all worked like a charm.
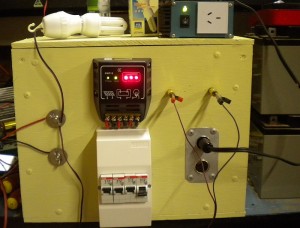
The PV, Inverter and Light all Connected
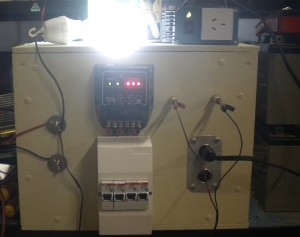
Everthing Switched On – Working Perfectly


All I have to do now is label everything and put a couple of handles on the box although I am reconsidering putting wheels on the unit as it quite heavy and difficult to move. This will be important if others in the family want to move it.

All in all I am very happy with the unit and I will be using it as much as i can over the next few weeks to make sure there are no problems and to see exactly how energy I can get out of it.

With the 11W globe shown I could provide simple lighting for at least 50 hours or I could power my laptop (through the inverter) for around 15 hours. I can also power anything that is made for use in the car using the cigarette lighter sockets.

The unit is capable of powering about 72W of lighting and a total of 300W of power in it’s present configuration. Of course, I would get less than 2 hours of use at that rate.

One final note about the wiring. Because the regulator switches the negative rail, the positive supply is the common. That means that all the circuit breakers are connected to the negative supply. This seems odd to many people who know a bit about electronics since the negative suppy is usually the common. However, it makes more sense to have the breakers in the side that is NOT common.

So I have one breaker for the PV, one for the battery, one for the regulator light output and one for the power. Normally, best practice is to use two breakers for the battery (on the postive and negative), especially if there is an inverter connected, but one breaker for this unit will be fine.

Even though many people omit the breaker for the PV in small systems it is important to have a breaker or at least an isolator so that when the battery breaker is off you can isloate the PV. Otherwise the PV can deliver power to the system and, if you have an inverter connected with a small (or no) load the PV can provide enough power to keep the inverter on and this presents a very real risk of electrocution on the output of the inverter.

Finally, using a current limited power supply I can charge the unit through the PV terminals. However, if I wanted to use a standard battery charger I could wire a cigarette lighter plug to the battery charger to connect to the 12VDC socket and deliver the charge that way. If I was going to use a charger on a regular basis I think I would simply add another set of terminals in parallel to the existing sockets and use the standard alligator clips that come with many chargers. But that’s a mod for the future.

What do you think of this post?
  • Awesome (0)
  • Interesting (3)
  • Useful (1)
Jul 01

The First Day of the Carbon Price

Well, it’s day one of Australia’s historic carbon pricing and, so far, the world has not ended ๐Ÿ™‚ !

Although the world is still turning, it has been interesting to see how the spot prices of wholesale electricy have changed over the last 24 hours.

This table from wattclarity.com.au shows pretty clearly that the prices have increased pretty much in line with the predictions. However, as they point out it is still to early to see where the prices will settle over time.

Price on Sunday
(including tax)
Price on Saturday
(pre tax)
Increase
QLD $52.45/MWh $31.25/MWh $21.20/MWh
NSW $58.56/MWh $32.00/MWh $26.56/MWh
VIC $63.36/MWh $36.71/MWh $26.65/MWh
SA $64.69/MWh $35.95/MWh $28.74/MWh
TAS $51.07/MWh $32.94/MWh $18.13/MWh

There are a couple of curious things about these prices if you think about the exposure to carbon intense fuel sources. SA has the highest price increase even though Victoria has the dirtiest fuel source (brown coal) while TAS, although having a lowest increase, still has a relatively high price increase considering that most of it’s power is generated by Hydro. It seems that the direct emissions due to the fuel type is only a part of the overall calculation.

One a personal note, I predicted earlier that my usage charges would rise by no more than 2.3 cents per kWh due to the carbon tax. This is in line with the prices increases in the table.

Origin partially confirmed that this week by informing me that my Green Power surcharge will be reduced by 44% or about 2.4cents per kWh to compensate for the price rises due partially to the carbon tax AND OTHER FACTORS.

So I’m predicting that the price rise will be higher but I intend to take them to task on this and ask for a breakdown of the increases.

I’d suggest that you do the same, especially if you are already purchasing GreenPower.

What do you think of this post?
  • Awesome (0)
  • Interesting (2)
  • Useful (0)
Jun 30

Blackout Buster – Part 2

100mm! – that’s all it would have taken, just 100mm and there would have been no grief whatsoever! Even 50mm, or in fact 25mm, would have made life so much simpler! Grrrrr!

After swearing and cursing for 10 minutes I felt better! I had just discovered, when I started to install the cigarette lighter sockets into the portable energy box (let’s just call it PEB – I know it’s not a great acronym but…), that I didn’t have quite enough room for the push on connector on the rear of the socket. In the words of Agent 86, “Missed it by that much”. Up until then, things had been going reasonably well.

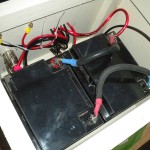
It’s taken longer than anticipated to wire up the unit as the space was a bit tighter than I would have liked (I’m blaming it on the size wood I had available rather than any underestimation of the dimensions required ๐Ÿ™‚ ) and I used larger guage cables than was really necessary. But I can guarantee that voltage drop won’t be an issue in this system. The battery cables connecting the two batteries together are the original 50mm cables that came with the batteries, and other odd and ends, from the decommissioned PABX and are intended forย  far higher currents than I will be subjecting them to.

The problem with the sockets had me stumped for a while as I had already made the cutouts for them, otherwise I could have bought a double socket assembly intended for under the dash and is surface mounted. However, after a bit of thinking and fiddling around and I was able to use a terminal socket to join the connector with about 5mm clearance. Phew!

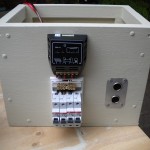
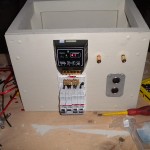
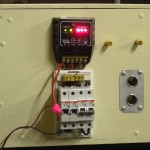
After quite a bit of time the front panel was wired up including the combo plug and screw (banana plug) terminals for the regulator controlled lights. A quick test confirmed all the connections were good. I cleaned up the batteries and installed them in the box and wired them up. Those heavy cables were a bit of a struggle in the tight space but all the cables were finally connected. Now for the big test.

I flicked the circuit breaker and up came the controller lights and all the voltages checked out. I connected a 12V light and the inverter and everthing worked fine. Huzzah!

I still have to make the final termination for the PV and possibly put a cover on the front to help protect the exposed components but the unit is now functional. As a final test, I temporarily connected the PV inputs to my bench power supply, which I can set to mimic a 80W PV panel, and switched on the circuit breakers. The charge light came on the regulator started delivering 5A to the batteries and they were slowly climbing above 13V. I left it on for several hours and the batteries were charging well. I switched off the unit for the night and I will check the battery condition in the morning and then give them another few hours of charge.

I will install the final set of terminations over the weekend, tidy up the last tiny things on the box and run some more tests.

Overall I am very happy with the unit and it will be a nice addition to my set of sustainablility tools.

What do you think of this post?
  • Awesome (2)
  • Interesting (5)
  • Useful (4)
Jun 29

Blackout Buster – Part 1

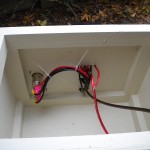
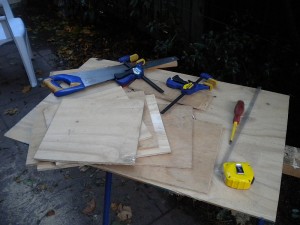
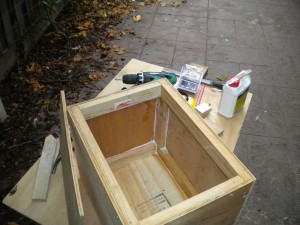
Last week, after I returned from Timor, I was a bit tired but still fired up enough to start work on my updated portable energy box to replace the small, now inoperative, one I built some time ago (see this post for details). Then I got sick! Damn bug got hold of me and wouldn’t let go for three or four days. Anyway, I finally got around to it on the weekend and made the box ready for the batteries and the electronics.

I used some timber that I had lying around for the box, but I did purchase some circuit breakers to use in an existing four way fuse box. I have also purchased a couple of other items including some cigarette lighter sockets and electrical plugs to use as connection points for various items such as lights and an inverter.


I toyed with the idea of mounting some wheels and a handle to move it around because it will be a bit heavy with two 38Ah batteries but decided to focus on the electrical side for now. I can always move it with my trolley when I need to. I had to focus on a few other things this week but I painted the box last night and now that it has two coats the box is ready for wiring up. I will wire the box up tomorrow.

The complete unit will have 76Ah of batteries, a 6A regulator that will accomodate around 80W of PV panels and a controlled output for lights, connections for a mains powered charger, two 12V cigarette lighter sockets (which will enable me to connect my small 150W inverter and other automotive gadgets) and one set of generic output terminals to connect other 12V equipment or a bigger charger.

Once it’s finished, I’ll provide some details on the testing and operation.

What do you think of this post?
  • Awesome (0)
  • Interesting (3)
  • Useful (2)