I remember it well, mulching away on a bright sunny day, pushing more and more branches through the mulcher, feeding more and more through it in a mulching frenzy and then…
“CRUNCH, CRACK, WHIRRRRRRRRRRRR!”
Hmmm, that didn’t sound good and why have the branches stopped in the mulcher?
All the branches were jammed in the mulcher and the adjusting screw on the side was at a funny angle and wouldn’t move! BOTHER! it’s broken! I had a quick look but couldn’t see anything obvious without pulling the covers off. The branches were well and truly jammed.
But I had some other things to do. So I put it away to look at later.
Just a Little Crack
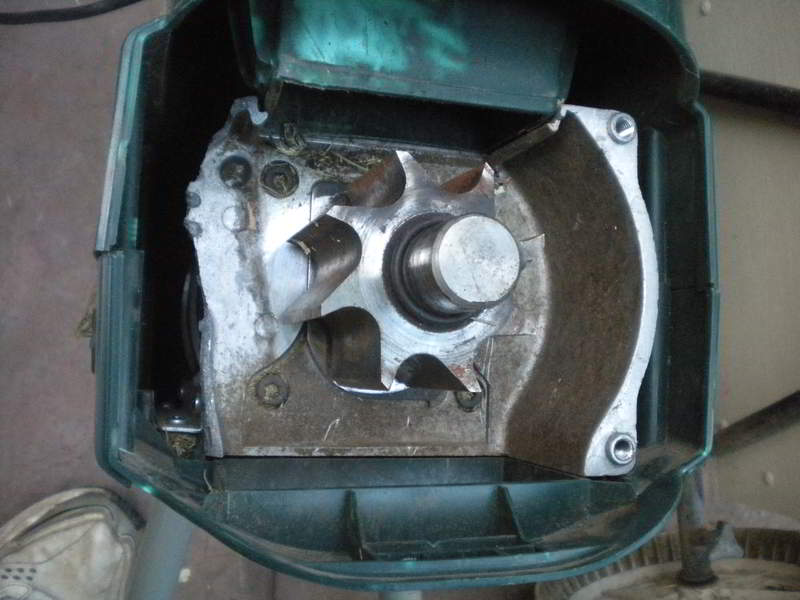
Quite a bit later (several weeks) I finally got around to look at it and I pulled the cover off and saw the casting had cracked.
It didn’t look too bad, maybe I could either weld or buy a right-angle bit of metal and bolt it on to hold it together.
But I had some other things to do. So I put it away to look at later.
Maybe the Damage is a Bit More Severe
Quite a bit later (many more weeks) I dragged out the mulcher, cleaned out the branches and took the cover off. Oh Oh! There appears to be a bit more damage than I first realised. This will be a much bigger job than I first thought.
This time I didn’t put it away but had a closer look and tried to figure out a plan to repair it if it was possible.
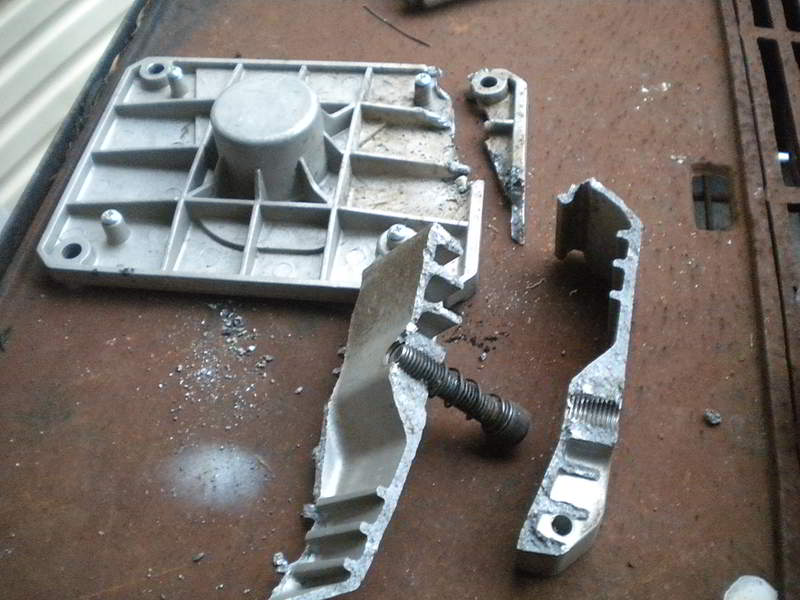
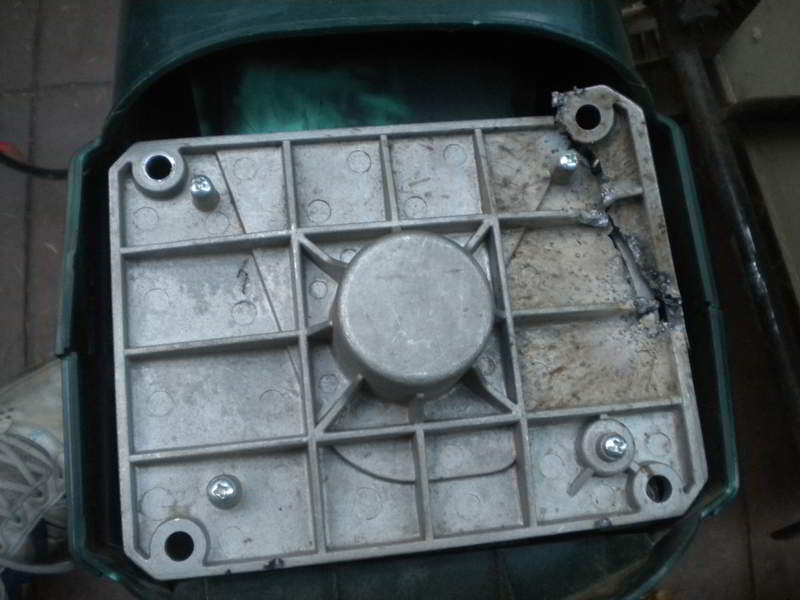
This is a Bit of a Mess
It was pretty clear that this casting was not repairable (just to be sure I touched it with the welder and got the non-result that I expected) and I was going to have to come up with another solution. Some sort of bracket would probably be the best bet but coming up with a workable solution was proving difficult.
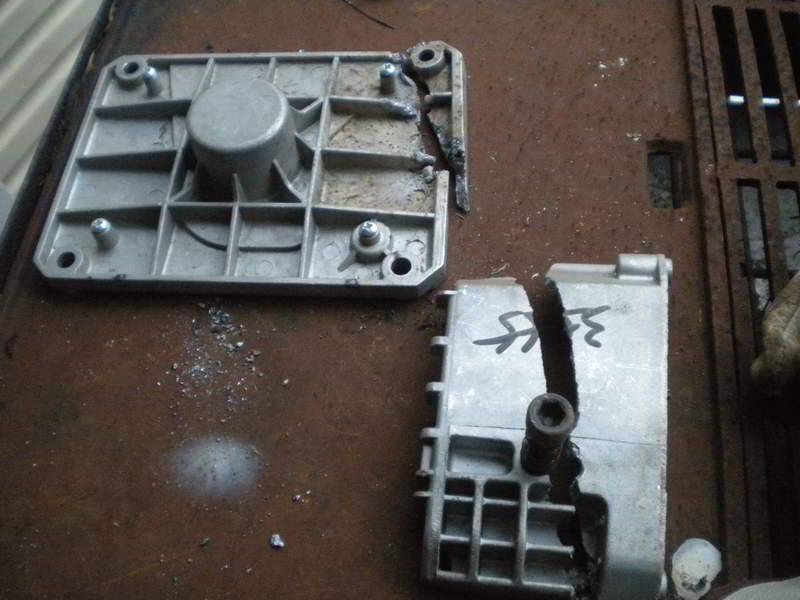
This is the Problem
I started to map out a solution requiring iron bracing inside the remaining casting with supports either side and a flate plate to replace the missing side wall and it was looking really, really complicated and time consuming. Then it dawned on me that I was over thinking this and all I really needed to do was make a frame to hold the adjusting screw and support the end plate.
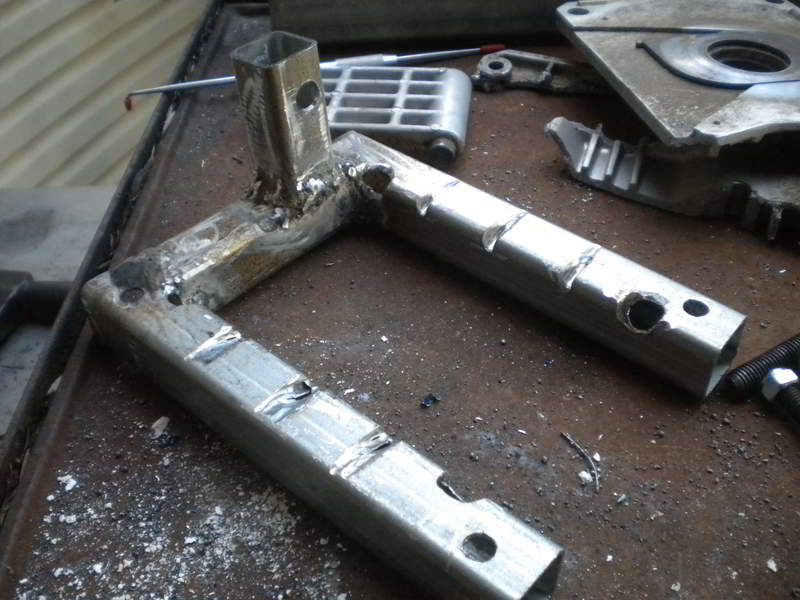
This is the Solution
Using some pieces of scrap 25mm RHS I welded up a frame that would fit over over the end plate and provide a mounting point for the adjustment screw. I must admit, my welding left a lot to be desired and the bracket looks pretty rough but it should do the job.
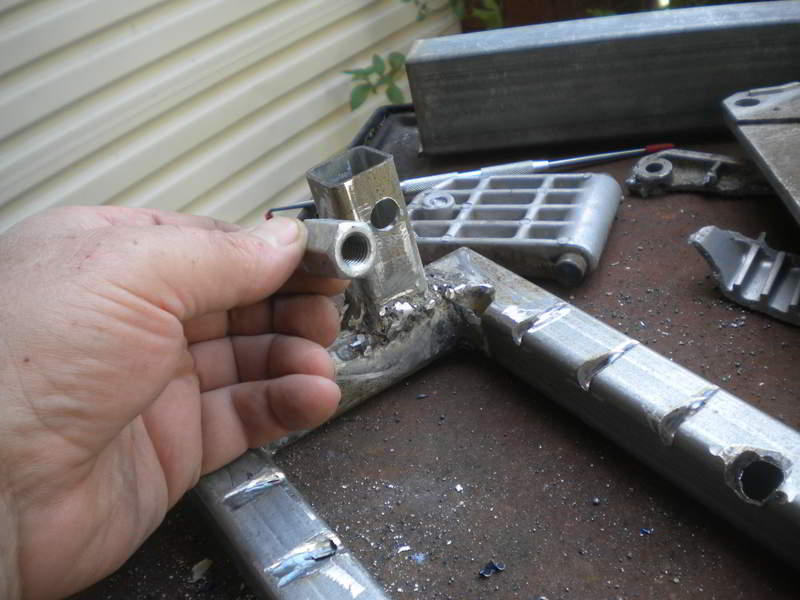
The Thread for the Adjustment Bolt
I was going to weld a nut onto the mount but I didn’t have one of the right size nor could I find one at the local hardware store. I was about to buy a nut and bolt combo and just use the nut when I found a joining collar with the right thread. I could cut it down to fit inside the RHS and it would be a better solution than the nut. Even better was that it was cheaper!
It was a simple matter to cut and weld it in place and and test it to make sure everything lined up properly.
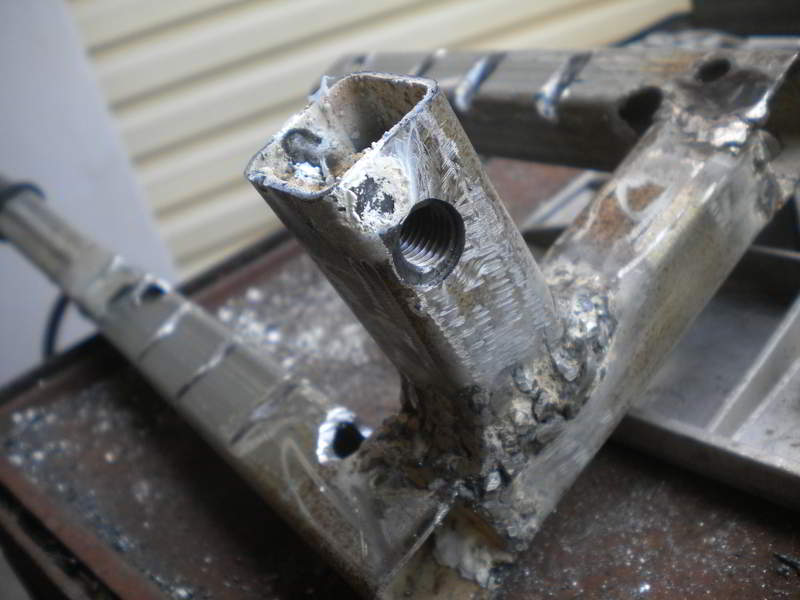
The Thread in Place
Testing the Cutting Adjustment
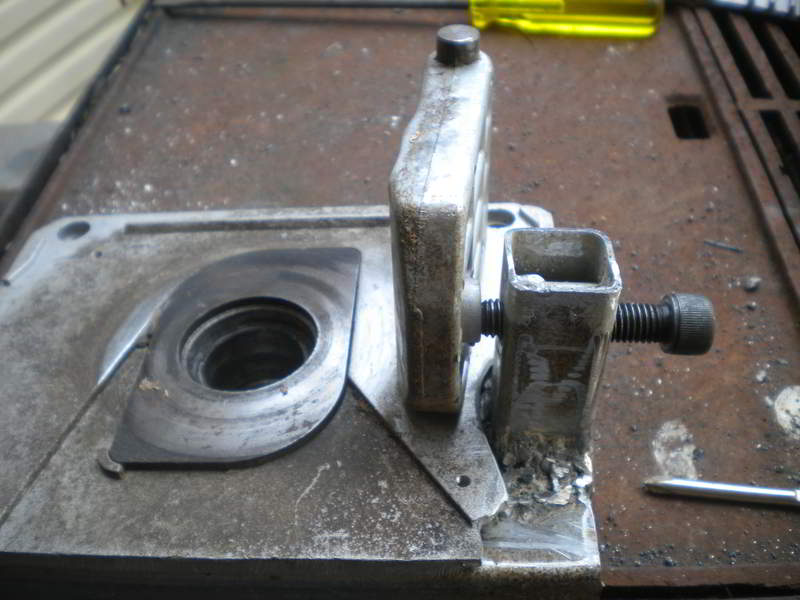
A quick coat of anti-rust paint and then it was bolted to the end plate by one of the now redundant bolts ready to be bolted back onto the mulcher.
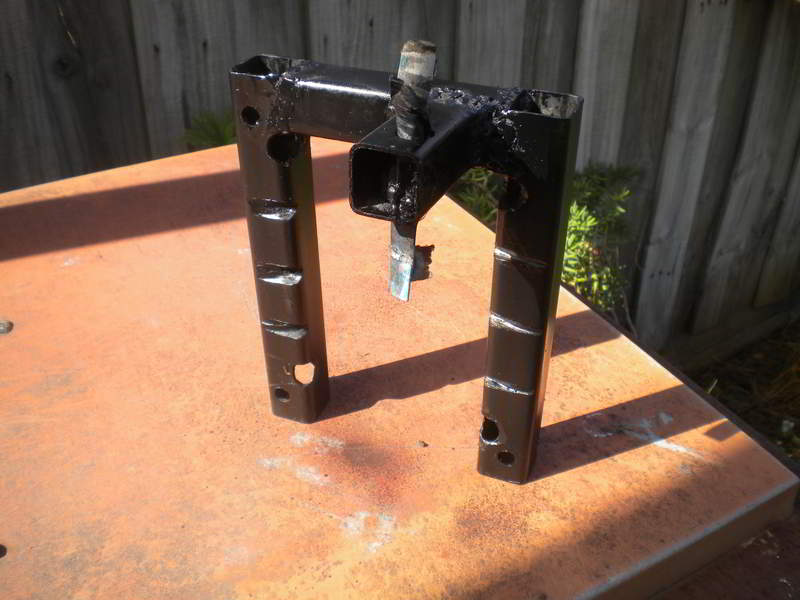
Coated with Anti-Rust Treatment
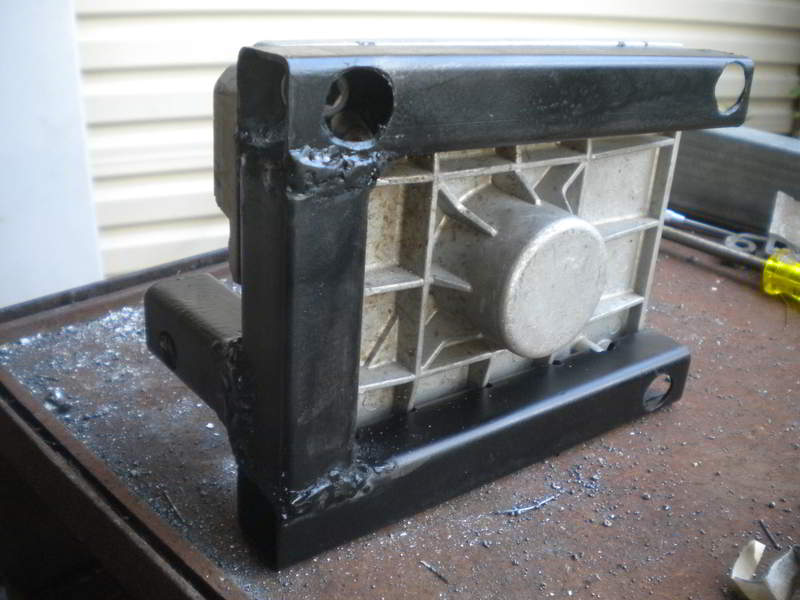
Bolt Holding the Plate and Bracket Together

All Mounted Back Onto the Mulcher
Once it was all mounted on the mulcher, I switched on the mulcher and adjusted the cutting edge. So far so good, now the real test.
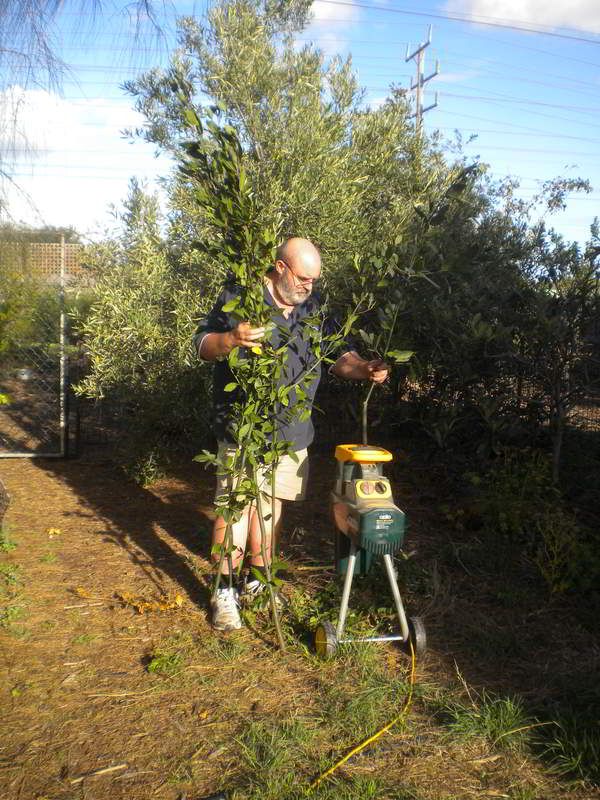
Testing the Mulcher
SUCCESS!! Here I am, doing the first test and happily mulching away.
It took several hours to do this repair but I am very happy with the result and the mulcher seems to be as good as new.
However, I will take it a bit easier now and not try to force so much through the poor little machine!