May 10

A Wonderful Idea

Sometimes you can forget, working away in your own backyard, that there are so many wonderful people out there who have the same concern and commitment to the environment and passion for sustainability.

Then along comes an event like this

A short documentary that follows the challenges of attempting to feed 2,200 people in the Sydney Opera House audience of TEDxSydney 2013 using only home grown & locally grown food.

Produced by The MilkBar, Sydney for TEDxSydney 2013.

You can find the original post HERE

A totally awesome idea that I felt compelled to share.

Perhaps we can each do it on a smaller scale in our own neighbourhood and create a grow it local event ourselves?

What do you think?

What do you think of this post?
  • Awesome (1)
  • Interesting (1)
  • Useful (0)
May 01

A Cunning Chook feeder

After much deliberation and procrastination, I finally put saw to wood and constructed the long awaited improved chicken feeder that I’ve been promising myself for ages.

Why a new chook feeder? Well, one of the problems with having truly free range chooks that are un-penned during the day (apart from the risk of Bloody Foxes), is that every freeloading sparrow, pigeon, starling, etc. comes from miles around to have a free feed.

This new feeder should fix that problem by allowing only the chickens to open the lid to get the feed.

chicken-feeder-09

Through a clever arrangement of levers the chickens can open the lid by stepping on the tread at the front of the feeder. However, other birds are not heavy enough to get the lid open.

Hey Presto! No more stolen feed.

If you want to build one yourself there are plenty of plans and photos on the web. One I found particularly useful is at http://www.woodworkingcorner.com/feeder.php.

chicken-feeder-01

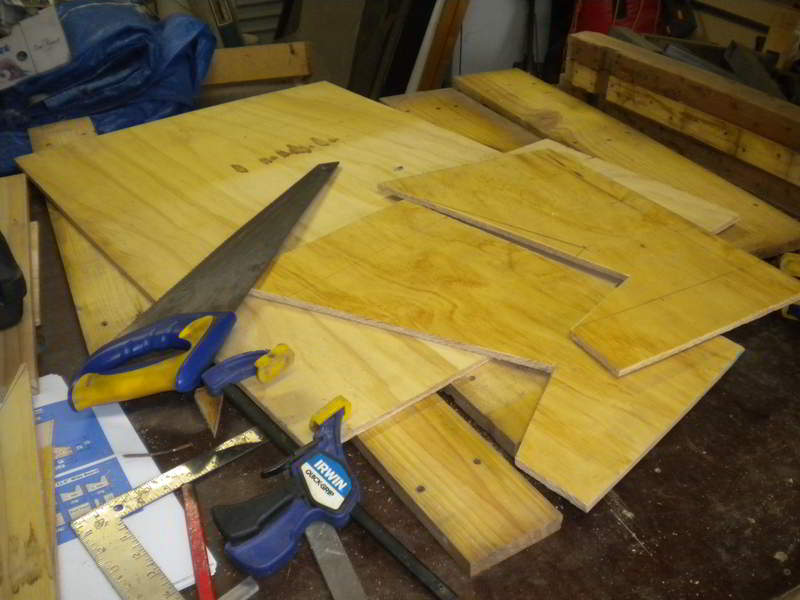
Using a mix of spare plywood, recycled pallets, a bit of glue and lots of screws plus a great deal of sweat and cursing, I was able to cobble together a reasonably functional feeder.

chicken-feeder-02

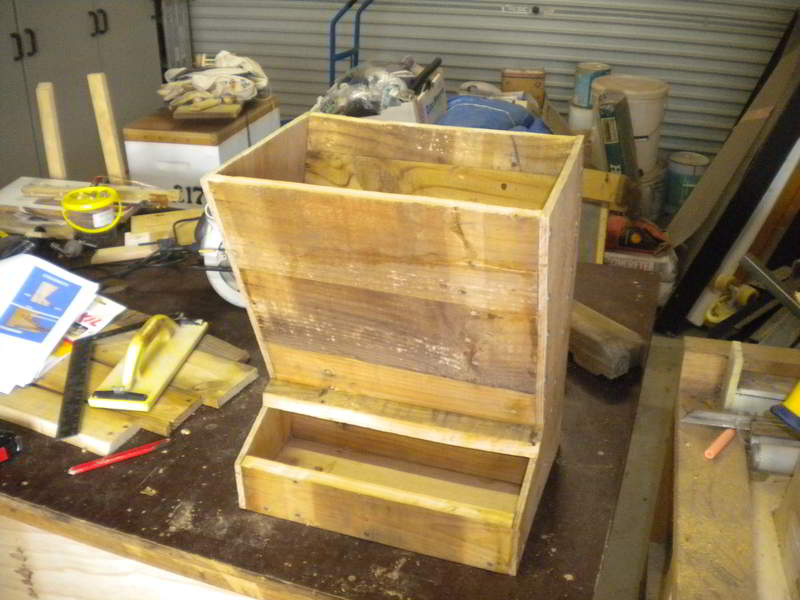
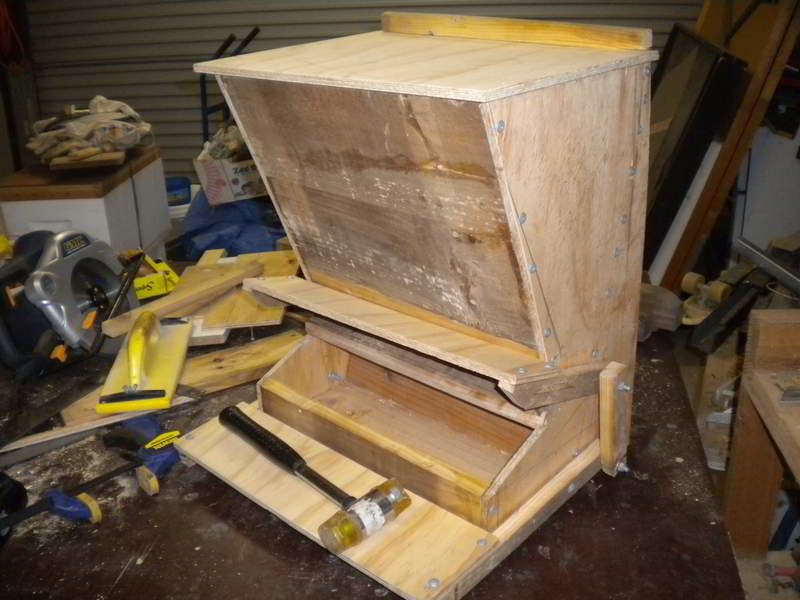
The feeder starting to take shape now that the sides are connected to the back. If you look carefully, you can see the individual slats that have been rebated to fit together with a bit of overlap. The main problem doing it this way is the additional screws to hold each slat in place.

chicken-feeder-03

chicken-feeder-04

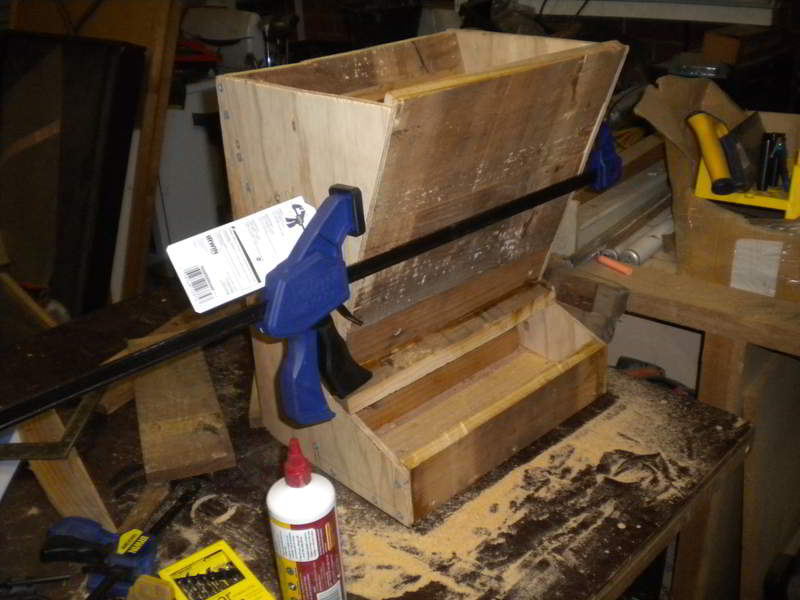
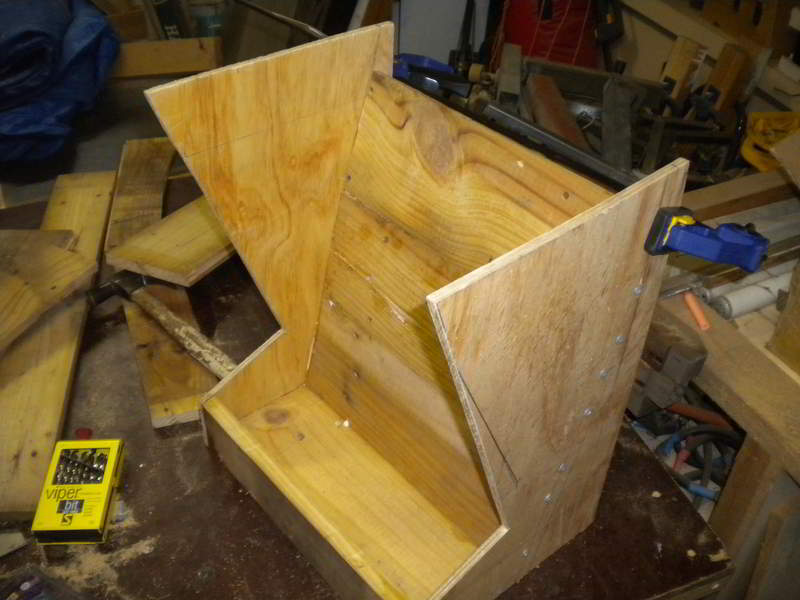
With the front, also made of individual slats, attached, the overall shape is well defined. It time to start on the treadle and the linkages.

chicken-feeder-05

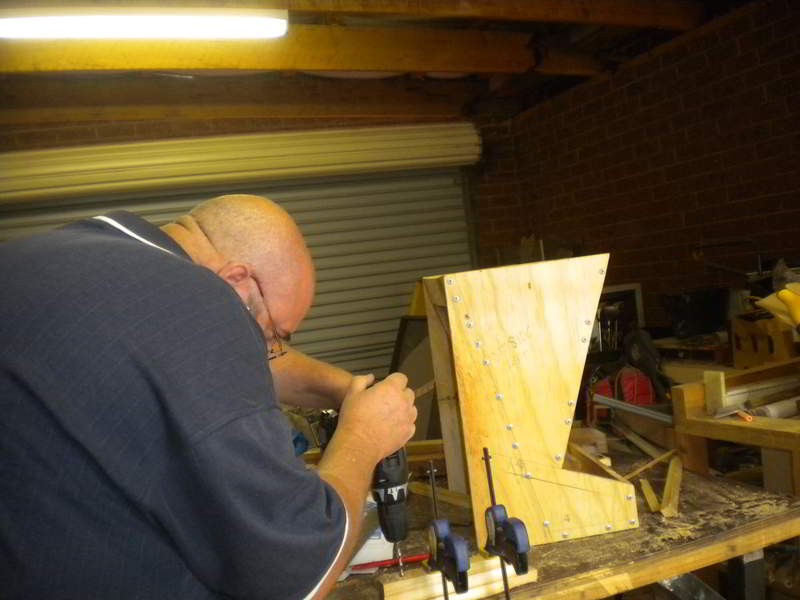
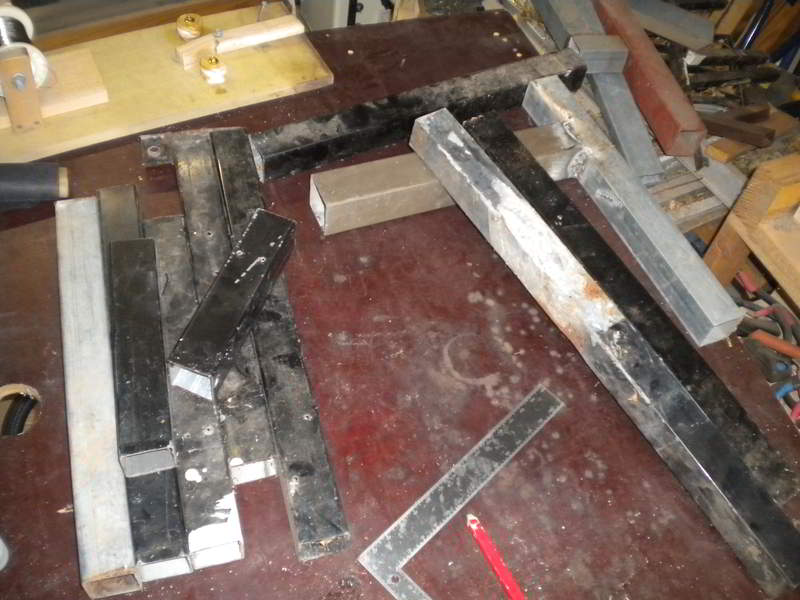
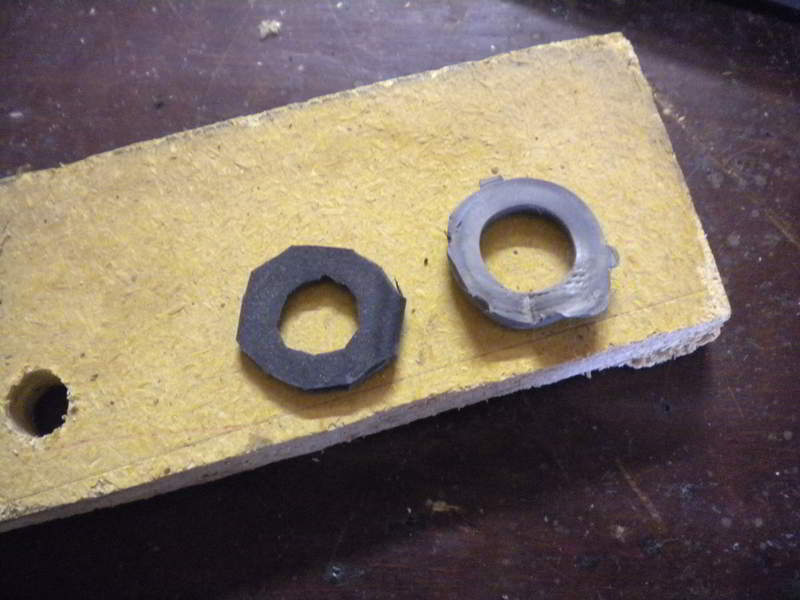
The links were made by ripping the slats into 25mm wide strips and cutting them to length. Then drilling the holes in the links for the bolts. Drilling them in pairs makes sure that the measurements are the same on both sides of the box. It would be nice to have a drill stand (sigh). But that’s a toy for the future.

chicken-feeder-06

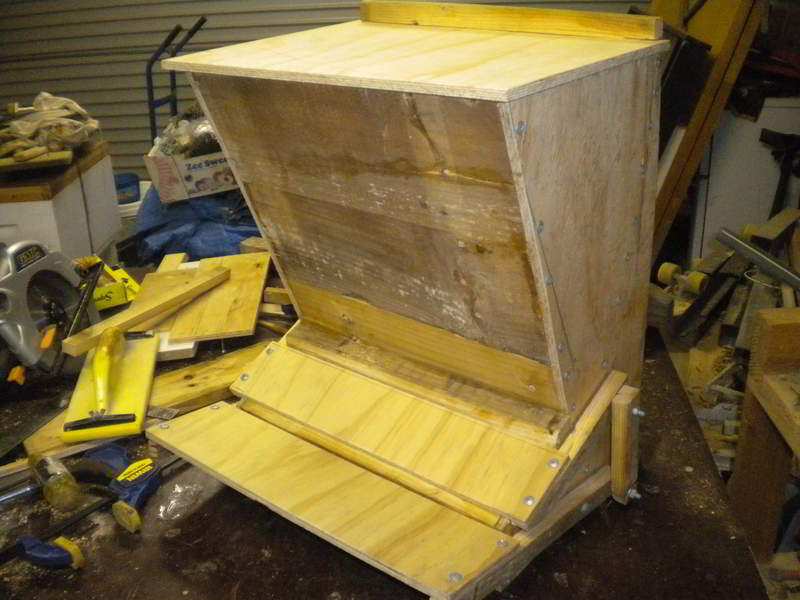
Tada! The finished unit with the feed access closed!

chicken-feeder-07

The finished unit with the feed access open…

chicken-feeder-08

…and with the hopper lid open for filling.

chicken-feeder-09

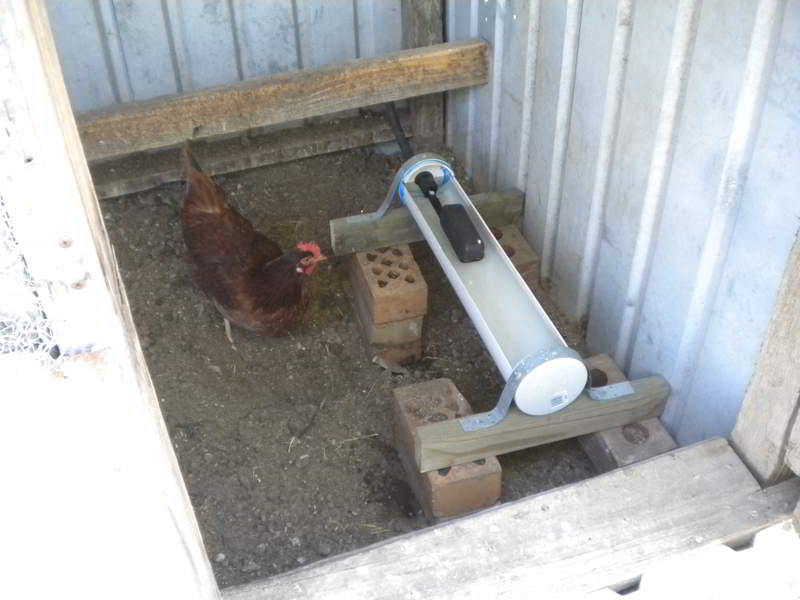
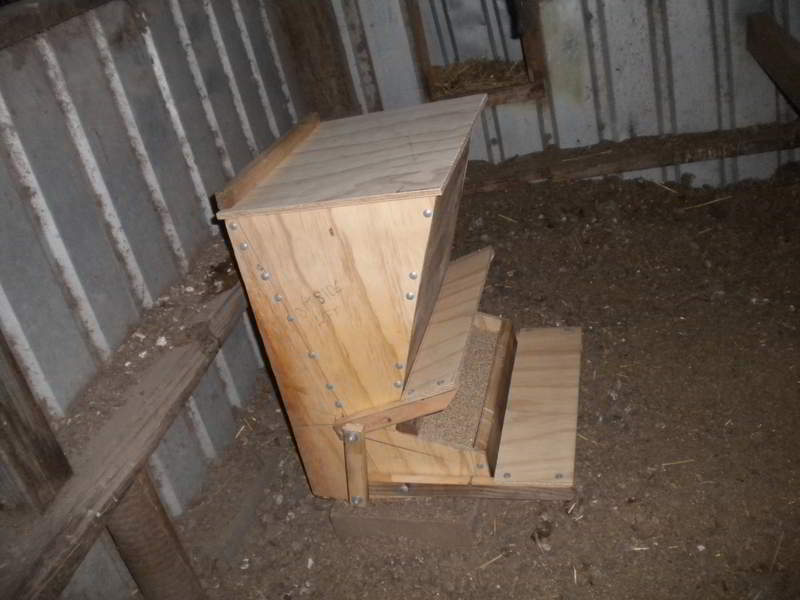
The feeder in place in the chook shed. The chooks looked bemused when I put in the coop but they seem to be using it without any problems. There is a screw in the side holding the access flap open so that they get used to it.

In a few days I will move the screw so that the access is only partially open so they get used to it moving and then, a few days later, I will remove the screw completely and the feeder will be fully functioning.

It’s taken a lot more effort than I anticipated but it will be worth it because I will be able to place many days of feed in the coop without worrying that the freeloaders will get it. Plus it’s always a nice feeling to make useful stuff using recycled or re-purposed material. It also saves a lot of money. Some of these feeders commercially cost hundreds of dollars. This one cost me less than $20 in bolts, screws and glue. The ply was left over from another project and the rest of the timber was from an old recycled pellet.

Very happy with the result. 😎

What have you made using recycled materials?

What do you think of this post?
  • Awesome (21)
  • Interesting (10)
  • Useful (10)
Apr 16

A Little Flat

Sometimes, a good idea doesn’t come off so well. This was the case yesterday when I decided to add some of the left over honey and water mixture left over from collecting the beeswax to our normal bread mixture.

Oops! There must have been too much sugar which stopped it rising properly and this happened…

unrisen-honey-bread

I think (hope) there was some other reason as well. It kind of tasted like it would been nice if it had only risen properly and not burned.

Anyway, I quickly made another loaf on the fast setting of the bread-maker and used less of the honey syrup and ended up with a much better result.

risen-honey-bread

This loaf would have risen more on the standard setting and was a bit dense, but yummy just the same.

At least the new chooks had a nice surprise today 🙂

What do you think of this post?
  • Awesome (1)
  • Interesting (3)
  • Useful (1)
Apr 13

Waxing Lyrical

uncapping 003

Another post about bees
Or more precisely their wax
And what to do when
you simply have stacks

Don’t throw it away
or leave it in heaps
where the honey and mess
through it all slowly seeps

Just gather it up
into one pot
the bit’s and the pieces
and heat up the lot

Together with water
to wash off the gunk
heat ’till it’s melted
and floats on the junk

The wax will go hard
as it cools in the ooze
you can then lift it off
and use as you choose

Use it for ointments
or maybe a candle
for polish and sealant
it’s hard to mishandle

You can even recycle
it back to the supplier
for the sheets in the frames
that are strengthened with wire

So think before tossing
or throwing away
this wax is worth keeping
it’s the sustainable way!

cappings
wax001
wax002
wax003


What do you think of this post?
  • Awesome (6)
  • Interesting (7)
  • Useful (0)
Apr 11

You Can Lead a Chook to Water

waterer-old-001

Well, the automatic watering system I built a couple of years ago finally bit the dust as the plastic hardened and cracked after being exposed to daylight. It was a good system, but it was always meant to be an interim solution until I fired up and built the proper, you beaut, whizz-bang one.

The system I had in mind would use an external tank and a float valve to control the level in a mini-trough


Using mostly parts I had lying around, except for the float-valve, hose-connector and end caps for the section of storm-water pipe, I commenced construction.

I wanted the tank to be on a stand to provide small amount of positive pressure for the float valve. I had some old bits of scrap length of metal fence post offcuts so I welded up a table and topped it with some old pieces of treated pine (I figure using treated pine waste increases it’s useful life and prevents it from going to landfill, for a while at least).

waterer-stand-001waterer-stand-002waterer-stand-003waterer-stand-005waterer-stand-006waterer-stand-007waterer-stand-009waterer-stand-008


It is seriously over-specified and took a lot longer to weld up than I anticipated but that’s what I had lying around.


The watering trough was considerably easier to put together, although I spent ages trying to decide how to provide a solid base. The trough itself was just a short section of 100mm plastic pipe with two end caps glued on and a section cut out along the length.

waterer-new-002


After that, it was just a matter of filling it with water and playing around with the location of the float valve to make sure it didn’t overflow. Once the location was determined a hole was cut into the end of the trough and the float valve was fitted.


waterer-test-001


One last final test to make sure everything was working correctly before doing the final assembly. Because it was getting a bit late I left it set up overnight and rechecked it in the morning and added the feet before installing it in the chook shed.


The next morning (well only just, as I had a leisurely start to the day) I moved all the pieces into place and installed it in the shed. It sounds easy when you say it fast like that but in reality, it wasn’t much more difficult. There was a bit of fiddling, cutting a hole in the wall, getting the hose lengths right, making sure the trough was secure enough etc. but it all came together quite well.

waterer-install-004waterer-install-005waterer-install-003


Well, not quite!

waterer-install-002


There was a leak at the connection on the tank. I thought I had sealed everything and I had used teflon tape etc. However it turned out that the rubber seal was damaged. I quickly cut a replacement from an old bike tire inner-tube, fitted it and voilà, perfect!


All in all it has been a very satisfying exercise, although the extra time, effort in welding, grinding and cutting somewhat offset the use of the free metal offcuts I used for the tank. The overall price, only for the parts I had to purchase, was about $50. If I had to purchase all the parts it would have been considerably more, but that’s the point really, re-using “waste” items or found objects to provide a useful function. The watering system should provide many years of fault free service and it will certainly be a lot easier to provide water to the chooks.


What do you think of this post?
  • Awesome (12)
  • Interesting (6)
  • Useful (7)