With a firm twist, it shattered. The plastic body had finally had enough and, as it slipped onto the bench in pieces, I realised that the reliable old pepper-mill had ground it’s last peppercorn
“Well, that’s that then”, I thought. But as I examined the pieces and saw that only the case had broken, I started to wonder whether it would be possible to fix it. Perhaps I could I glue it back together. Was there another possibility, would it be worth the effort or would it simply be easier to buy a replacement. The recycler and maker within, recoiled in loathing and insisted that I examine the problem in more detail.
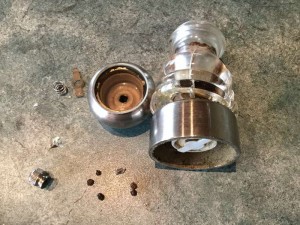
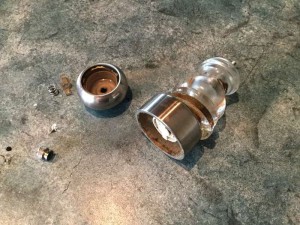
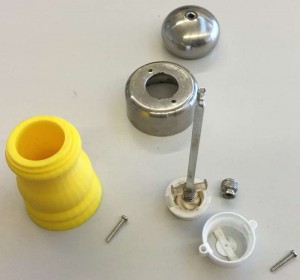
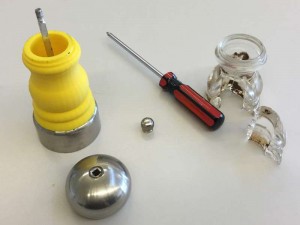
I laid out all the pieces out to see if anything could be done.
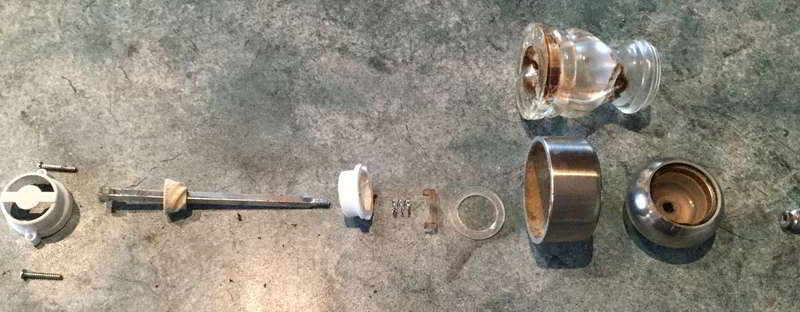
As I examined the anatomy of the pepper-mill it was clear that the body was probably beyond repair but the rest of the mill appeared to be in good working condition. It might be possible to fashion a replacement body and repair the mill. However, there was another piece missing. A small retainer clip was lost that holds the spring mechanism together. This allows the tension to be adjusted to change the fineness of the ground pepper. If I was going to repair the mill properly, I would need to replace the clip or fashion and alternative means of holding the spring mechanism in place.
So, how to fashion a new body. Numerous possibilities floated through my head.
- I could turn it down from wood or metal; I have access to a metal lathe but not a wood lathe.
- I could make a mould from the original and cast a replacment; it would require the purchase of some moulding and casting materials and some modifications to the mould itself.
- I could fall back to the original idea of gluing it back together; that could work but the original was quite badly damaged
- I could 3D print a replacement; I have access to a suitable 3D printer and there is free design software available on-line.
In the end, I decided to try the 3D printer as it was the easiest option for me to make and, if it didn’t work out, I could try option two and try and turn down a replacement on the lathe. I also decided to try to keep as much of the original design intact with the multiple curves and bulges.
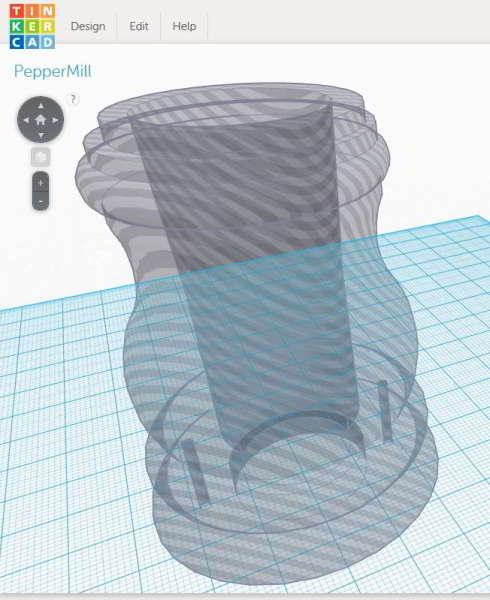
Armed with a ruler and a a vernier, I started taking internal and external measurements of the body and making some modifications to the internal structure to incorporate a means of retaining the internal spring mechanism.
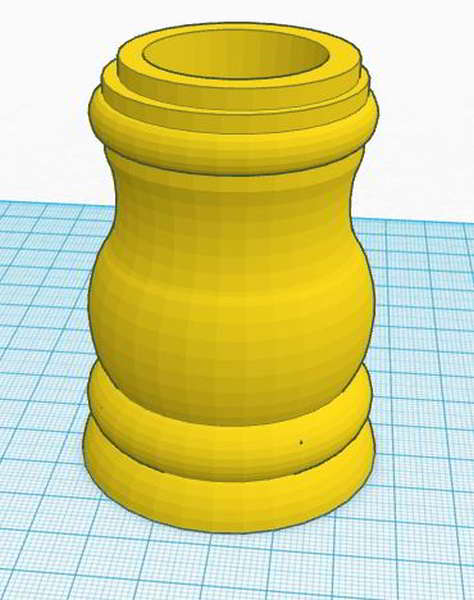
I used a free on-line design program called Tinkercad that provides a quick and easy to use interface to assemble shapes into complex 3D objects. I probably spent far too long playing with the design and tweaking things but it was fun getting the body just the way I wanted it.
Once the design was done it was simply a matter of printing on the 3D printer. This was quite a large print and I was concerned that there may be some distortion of the base and other areas but the print worked really well.
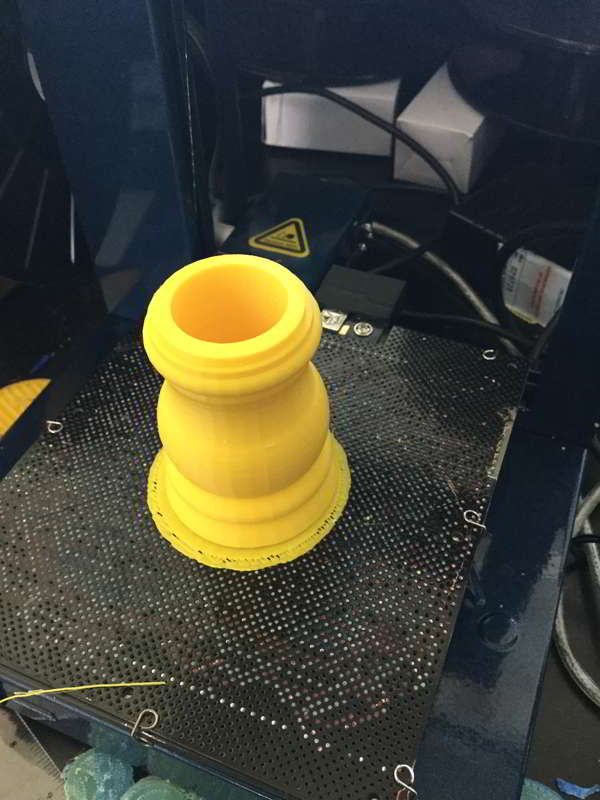
 There was some roughness on the bottom surfaces from the scaffolding used to hold the melted plastic in place and stop it sagging. However, a quick clean with a file and sandpaper after breaking off the scaffolding solved that issue.
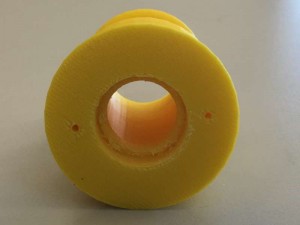
The lip near the base of the mill is the redesigned retaining device for the spring mechanism. There are also two pilot holes printed in place to increase the amount of solid plastic wall available for the self tapping screws to ensure a solid attachment.
The print took about three and a half hours but it was largely unsupervised and the printer just plodded along in the background.
All the parts were collected and checked to make sure everything fitted together properly. A few touches here and there with a file and some sandpaper made sure of a snug fit.
It was then just a matter of assembling the pepper-mill with a screwdriver, filling with pepper and trying it out.
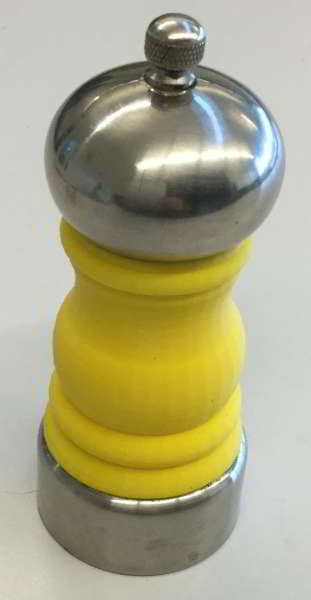
The pepper-mill works even better than before, no doubt due to the new retaining mechanism, and the the movement is smooth and consistent.
The grinding adjustment works really well and does not drift.
The plastic is ABS (same as Lego) and considered food safe. The amount of plastic likely to break away and mix with the pepper is too small to worry about so I am happy that there is no problem with using this material in this way.
I wasn’t sure about the bright yellow colour at first. I picked it partly because it was already loaded into the machine and partly because I couldn’t decide if I liked any of the other colours better. However, it was a hit with everybody else in the house and it has grown on me as well.
It used less than $4 of plastic, based on what we pay for a roll of the plastic thread. It took many hours of my time but I enjoyed the challenge of creating the new part and modifying the design.
It took a lot longer to complete the project than I anticipated but the end result was fabulous! All in all, I am very happy with the result and that I was able to repair, rather than throw away and replace. If it turns out that the plastic does not last long term then I always have the option to try another on the lathe, based on the same design.
What about you. What have you been able to repair rather than replace?
There are a number of “maker-spaces” cropping up all over the world where people can access tools and expertise to help them make or repair things. Would you consider joining to one of these places to getaccess to tools including 3D printers to help repair or create items for around the house?
PS: If you are interested in looking in more detail about how I did the 3D design have a look at the link below. It will allow you to look around the model, using the mouse to move and rotate it. Try using all the mouse buttons to see how it can be moved.
You can also go into the design program and edit a copy of the design yourself. If you do, let me know how you went and send me a link to your version.

 I finally finished it.