Jul 27

Back in Timor Leste

It’s great to be back in Timor Leste helping our northern neighbours as they rebuild their nation. It’s even more gratifying knowing that we have the support and assistance of a large group of people who have donated their time and money to help us in this great work.

Here is a random selection of photos from our first installation in Atekru, a small fishing village on Atauro, the island off the coast of Dili. We were warmly welcomed by the community and the ATA and Timor Adventure groups had a fabulous time installing lights and power at the local primary school.

I’ll have more details shortly, but for now enjoy the happy snaps.

unloading rotary containera school group collecting donated furniture from rotary
bronze medallist Jane Moran
leaving dili beach

leaving Dili beach 2

heading for Dili 2
heading for Dili
in the fishing boat
arrival at fishing village Atekru

installation activity
installing the lights

final connections by torchlight

200Ah of batteriessystem control board

up go the panels 2
up go the panelssystem hondover

What do you think of this post?
  • Awesome (11)
  • Interesting (5)
  • Useful (5)
Jun 22

Destination East Timor: It’s Pozible

timor-funds-001

Volunteers from the Alternative Technology Association (ATA) are once again heading to East Timor in July for three to four weeks installing Solar Power Systems and conducting Training in Remote communities across the country.

The International Project Group (IPG) in the ATA (wow! that’s a mouthful of acronyms) have a diverse mix of projects to complete this year, in collaboration with our friends and sponsors in Timor and Australia, including several large community and school based systems together with the supply of equipment and training for the roll-out of almost 200 household systems.


Many of the volunteers take unpaid leave and pay their own way as part of their commitment to our friends in East Timor. This year the ATA has setup some projects on Pozible to help raise funds to cover some of the costs (eg. airfares, accommodation, etc.) for the volunteers.

timor-funds-002

Pozible is an Australian Crowd Funding website set up to help people raise funds for projects in a variety of fields. This new kind of model allows people to participate and help mostly small to medium projects get off the ground by accessing funding outside the traditional funding model. Rather than investing, people pledge money to the projects, and in return, the project creators offer rewards in line with the level of commitment. There are similar schemes in place overseas and the model in proving to be very popular and effective for all kinds of creative projects.

If you would like to help out this year’s projects in East Timor or find out more, head over to the ATA page (click-here) on the Pozible website and check out the current projects.

timor-funds-003

What do you think of this post?
  • Awesome (7)
  • Interesting (7)
  • Useful (6)
May 10

Supporting Renewable Energy

Today we became household members of a new non-profit organisation set-up to provide funding for new renewable energy projects in Australia.

Citizens Own Renewable Energy Network Australia – CORENA

CORENA has been setup to provide donated funds from ordinary people to start an round robin funding scheme for large and small renewable energy and energy efficiency projects. People around Australia are tired of waiting for the Government to really get behind renewable energy and they wanted a way to help kick start the process.

pv-smallThe idea is that donated funds provide an interest free loan for small community based systems that are paid back with the savings from using the system. As the funds are paid back they can be used to fund another small system. As more donations are received the project can expand until it is essentially self supporting with a funding pool sufficient to enable continuous rollout of small systems.


pv-large

The donated funds can also be used to fund or part fund much larger commercial projects which can provide an investment return which can be added to the total pool for ongoing funding of projects.


It’s important to remember that this is not a monetary investment and the funds are donated. However, it is an investment in our future. If you would like to find out how you can help, checkout the website and facebook page at:

http://corenafund.org.au/
fbFind CORENA on Facebook

Go on, make a difference.


What do you think of this post?
  • Awesome (7)
  • Interesting (6)
  • Useful (6)
Sep 06

Measuring a Loaf of Bread

Well, it’s been a while since I posted. I’ve been sidetracked with a few things, some of which will be the subject of future posts. But I thought it was about time I got back into the swing of things because today I found the perfect subject, measuring a loaf of bread.

How do you measure a loaf of bread? Length? Breadth? Width? No?

How about weight? What about calories? Food miles/kilometres? Energy used in production? Greenhouse house gas emmissions (GHG)? Hmmm, now we’re getting closer.

In fact, all those ways are valid, interesting and informative. But I particularly wanted to measure the energy used by our (not so new) breadmaker in making a loaf of bread. Why? Because I hadn’t got around to it yet and I like to understand how our appliances use energy. This helps us reduce our overall energy use. And, since Sustainable House Day is on this weekend, I thought it would be a timely post on measuring energy use.

So how do you measure how much power a breadmaker (or anything else) uses? With a clever little device called a power meter. These meters connect between the power point and the appliance and record power, energy, cost, GHG, etc.

I use one particular brand of power meter that I bought a few years ago when I was doing energy audits but there are many different brands on the market and they do a good job. You can also hire them from various environmental groups and businesses. Many of the newer models store the readings or allow you to download the data to a computer for further study, or to create charts and graphs. This allows you to see how you are using energy and where savings can be made. It also provides a great way to chart your progress.

To use the meter I simply connected the cable from the meter to the powerpoint and then connected the breadmaker to it and let it do it’s thing for the next 4 hours. The picture shows the setup with the meter sitting on top of the toaster for convenience. The display is showing approx $0.10, the total cost of electricity used.

The interesting thing about the breadmaker is that it has three different power consumption points. Most of the time it is just sitting there monitoring the temperature and time as the dough “proves” or rises. Occassionally it switches on the heating element to maintain the ideal proving temperature. It also uses more power when mixing and kneading the dough and , of course, there is the actual cooking time. Suprisingly, during the proving time it only uses about 0.5W which is considerably smaller than the standby load of many appliances. During the heating or cooking phase the power usage climbs to around 550W. The pictures below show the various readings at or near the end of the cooking process.

Maximum power (W)

Total Energy Consumed (kWh)

The Nominal GHG produced (kg CO2-e)
(In Victoria)

So the breadmaker adds about 0.4kWh to our daily use at a cost of approx. $0.10 assuming 1 loaf per day. We would also be emitting around 600g of CO2 if we weren’t on 100% greenpower. Even with the cost of the electricity the cost of the bread is significantly lower than shop bought bread.

Of course, none of this takes into the account the growing, processing, packaging and delivery of the flour and other ingredients. However, these would be similar even for shop bought bread.

The other important measure is what does the bread taste like. Absolutely delicious with no added bits to be concerned about.

And for those who are interested, here is the recipe we use for our daily bread. You may need to adjust the mix to suit your machine or method.

1 1/4 teaspoons breadmakers yeast
2 cups white bread flour/mix
1 cup multigrain flour/mix
1/2 cup rolled oats
330ml water
1 tablespoon vegetable oil

YUM!

What do you think of this post?
  • Awesome (4)
  • Interesting (8)
  • Useful (4)
Jul 04

Blackout Buster – Part 3

The PEB (Portable Energy Box – I really must find a better acronym) is complete. Well, at least electrically.

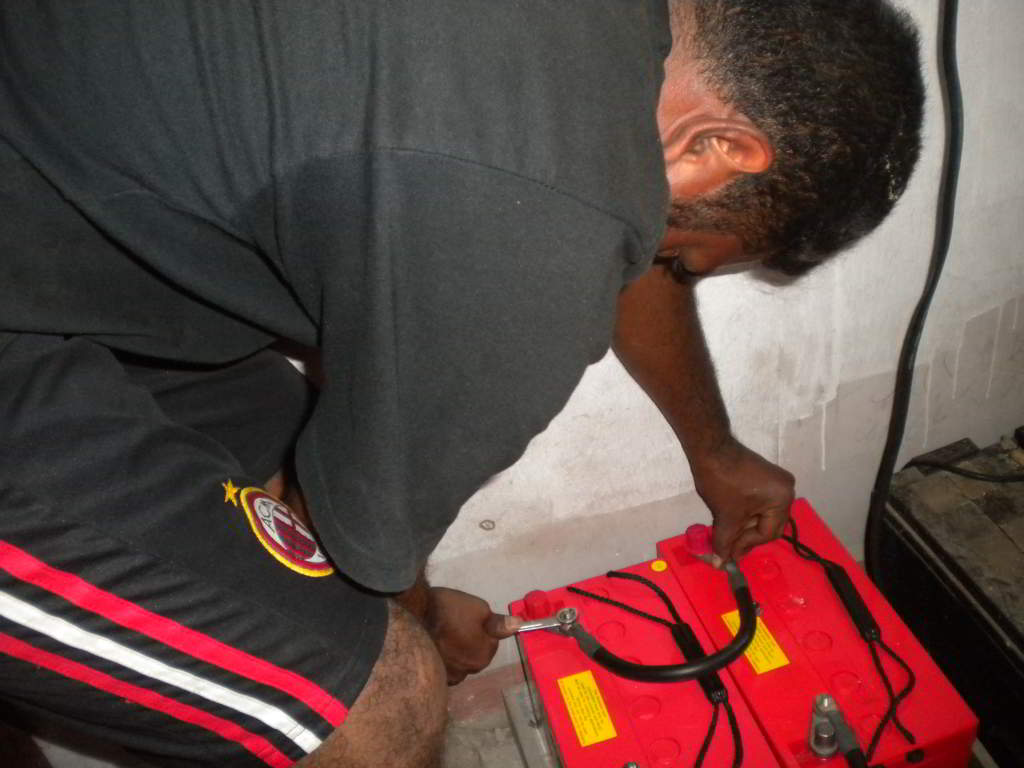
Today I installed the PV connectors after having kept the unit on charge for a few days to check the performance and make sure the batteries were still in good condition since they had been sitting around for a while. Gel cells tend to have quite a good shelf life as long as they are kept reasonably charged but not all of these have been regularly topped up so it is important to check them over before putting them into service.

I decided to try a different type of terminal for the PV compared to the light terminals. I constructed these terminals from 6mm stainless steel (316) bolts, washers and wingnuts. Partly because I already had the bolts and partly because I thought they would be cheaper and I wanted to try a few different techniques. As it turned out they worked out a little cheaper but I’m not sure it was really worth it. Especially since the terminals I used for the lights are very good quality as well.

Assembling and Attaching the PV Terminals

The Negative Terminal in place wating for the Washers and Wingnut


The nice thing about having terminals like these is that the unit becomes truely portable as you can easily connect and disconnect the PV.

The Completed Unit With All the Connectors

I did a final test with everthing running. The power supply substituted for the PV and the inverter and a lamp were all connected as shown in the pictures. It all worked like a charm.

The PV, Inverter and Light all Connected

Everthing Switched On – Working Perfectly


All I have to do now is label everything and put a couple of handles on the box although I am reconsidering putting wheels on the unit as it quite heavy and difficult to move. This will be important if others in the family want to move it.

All in all I am very happy with the unit and I will be using it as much as i can over the next few weeks to make sure there are no problems and to see exactly how energy I can get out of it.

With the 11W globe shown I could provide simple lighting for at least 50 hours or I could power my laptop (through the inverter) for around 15 hours. I can also power anything that is made for use in the car using the cigarette lighter sockets.

The unit is capable of powering about 72W of lighting and a total of 300W of power in it’s present configuration. Of course, I would get less than 2 hours of use at that rate.

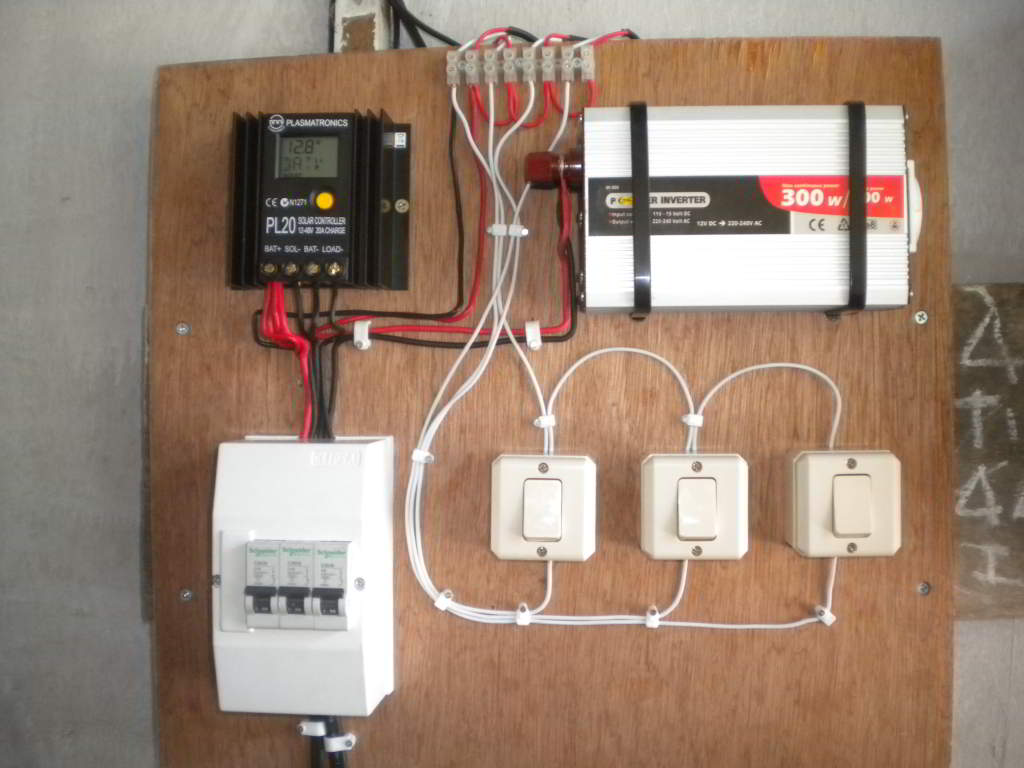
One final note about the wiring. Because the regulator switches the negative rail, the positive supply is the common. That means that all the circuit breakers are connected to the negative supply. This seems odd to many people who know a bit about electronics since the negative suppy is usually the common. However, it makes more sense to have the breakers in the side that is NOT common.

So I have one breaker for the PV, one for the battery, one for the regulator light output and one for the power. Normally, best practice is to use two breakers for the battery (on the postive and negative), especially if there is an inverter connected, but one breaker for this unit will be fine.

Even though many people omit the breaker for the PV in small systems it is important to have a breaker or at least an isolator so that when the battery breaker is off you can isloate the PV. Otherwise the PV can deliver power to the system and, if you have an inverter connected with a small (or no) load the PV can provide enough power to keep the inverter on and this presents a very real risk of electrocution on the output of the inverter.

Finally, using a current limited power supply I can charge the unit through the PV terminals. However, if I wanted to use a standard battery charger I could wire a cigarette lighter plug to the battery charger to connect to the 12VDC socket and deliver the charge that way. If I was going to use a charger on a regular basis I think I would simply add another set of terminals in parallel to the existing sockets and use the standard alligator clips that come with many chargers. But that’s a mod for the future.

What do you think of this post?
  • Awesome (0)
  • Interesting (3)
  • Useful (1)